Labels
Create and manage message labels
Labels are applied directly to messages, making it easy to categorise and filter individual messages across your inbox.
Creating Labels
- Go to Settings → Labels
- Click Create Label
- Enter:
- Name - label text (e.g. "VIP", "Bug Report", "Sales Lead")
- Color - visual identifier
Using Labels
- Open a conversation in the inbox
- Click the Label icon on a message
- Select one or more labels
- Labels appear as colored badges on the message
Because labels are attached to messages (not conversations), you can label specific messages within a chat - for example, marking a single message as important while leaving the rest unlabelled.
System Labels
Some labels are applied automatically by the system:
| Label | Applied when |
|---|---|
| Media | The message contains an image, video, document, or audio file |
| Question | The contact is asking a question |
System labels cannot be edited or archived.
Filtering by Label
Use labels to filter messages in the inbox:
- Click a label in the filter bar to show only messages with that label
- Combine labels with other filters (status, assignee) for more precise views
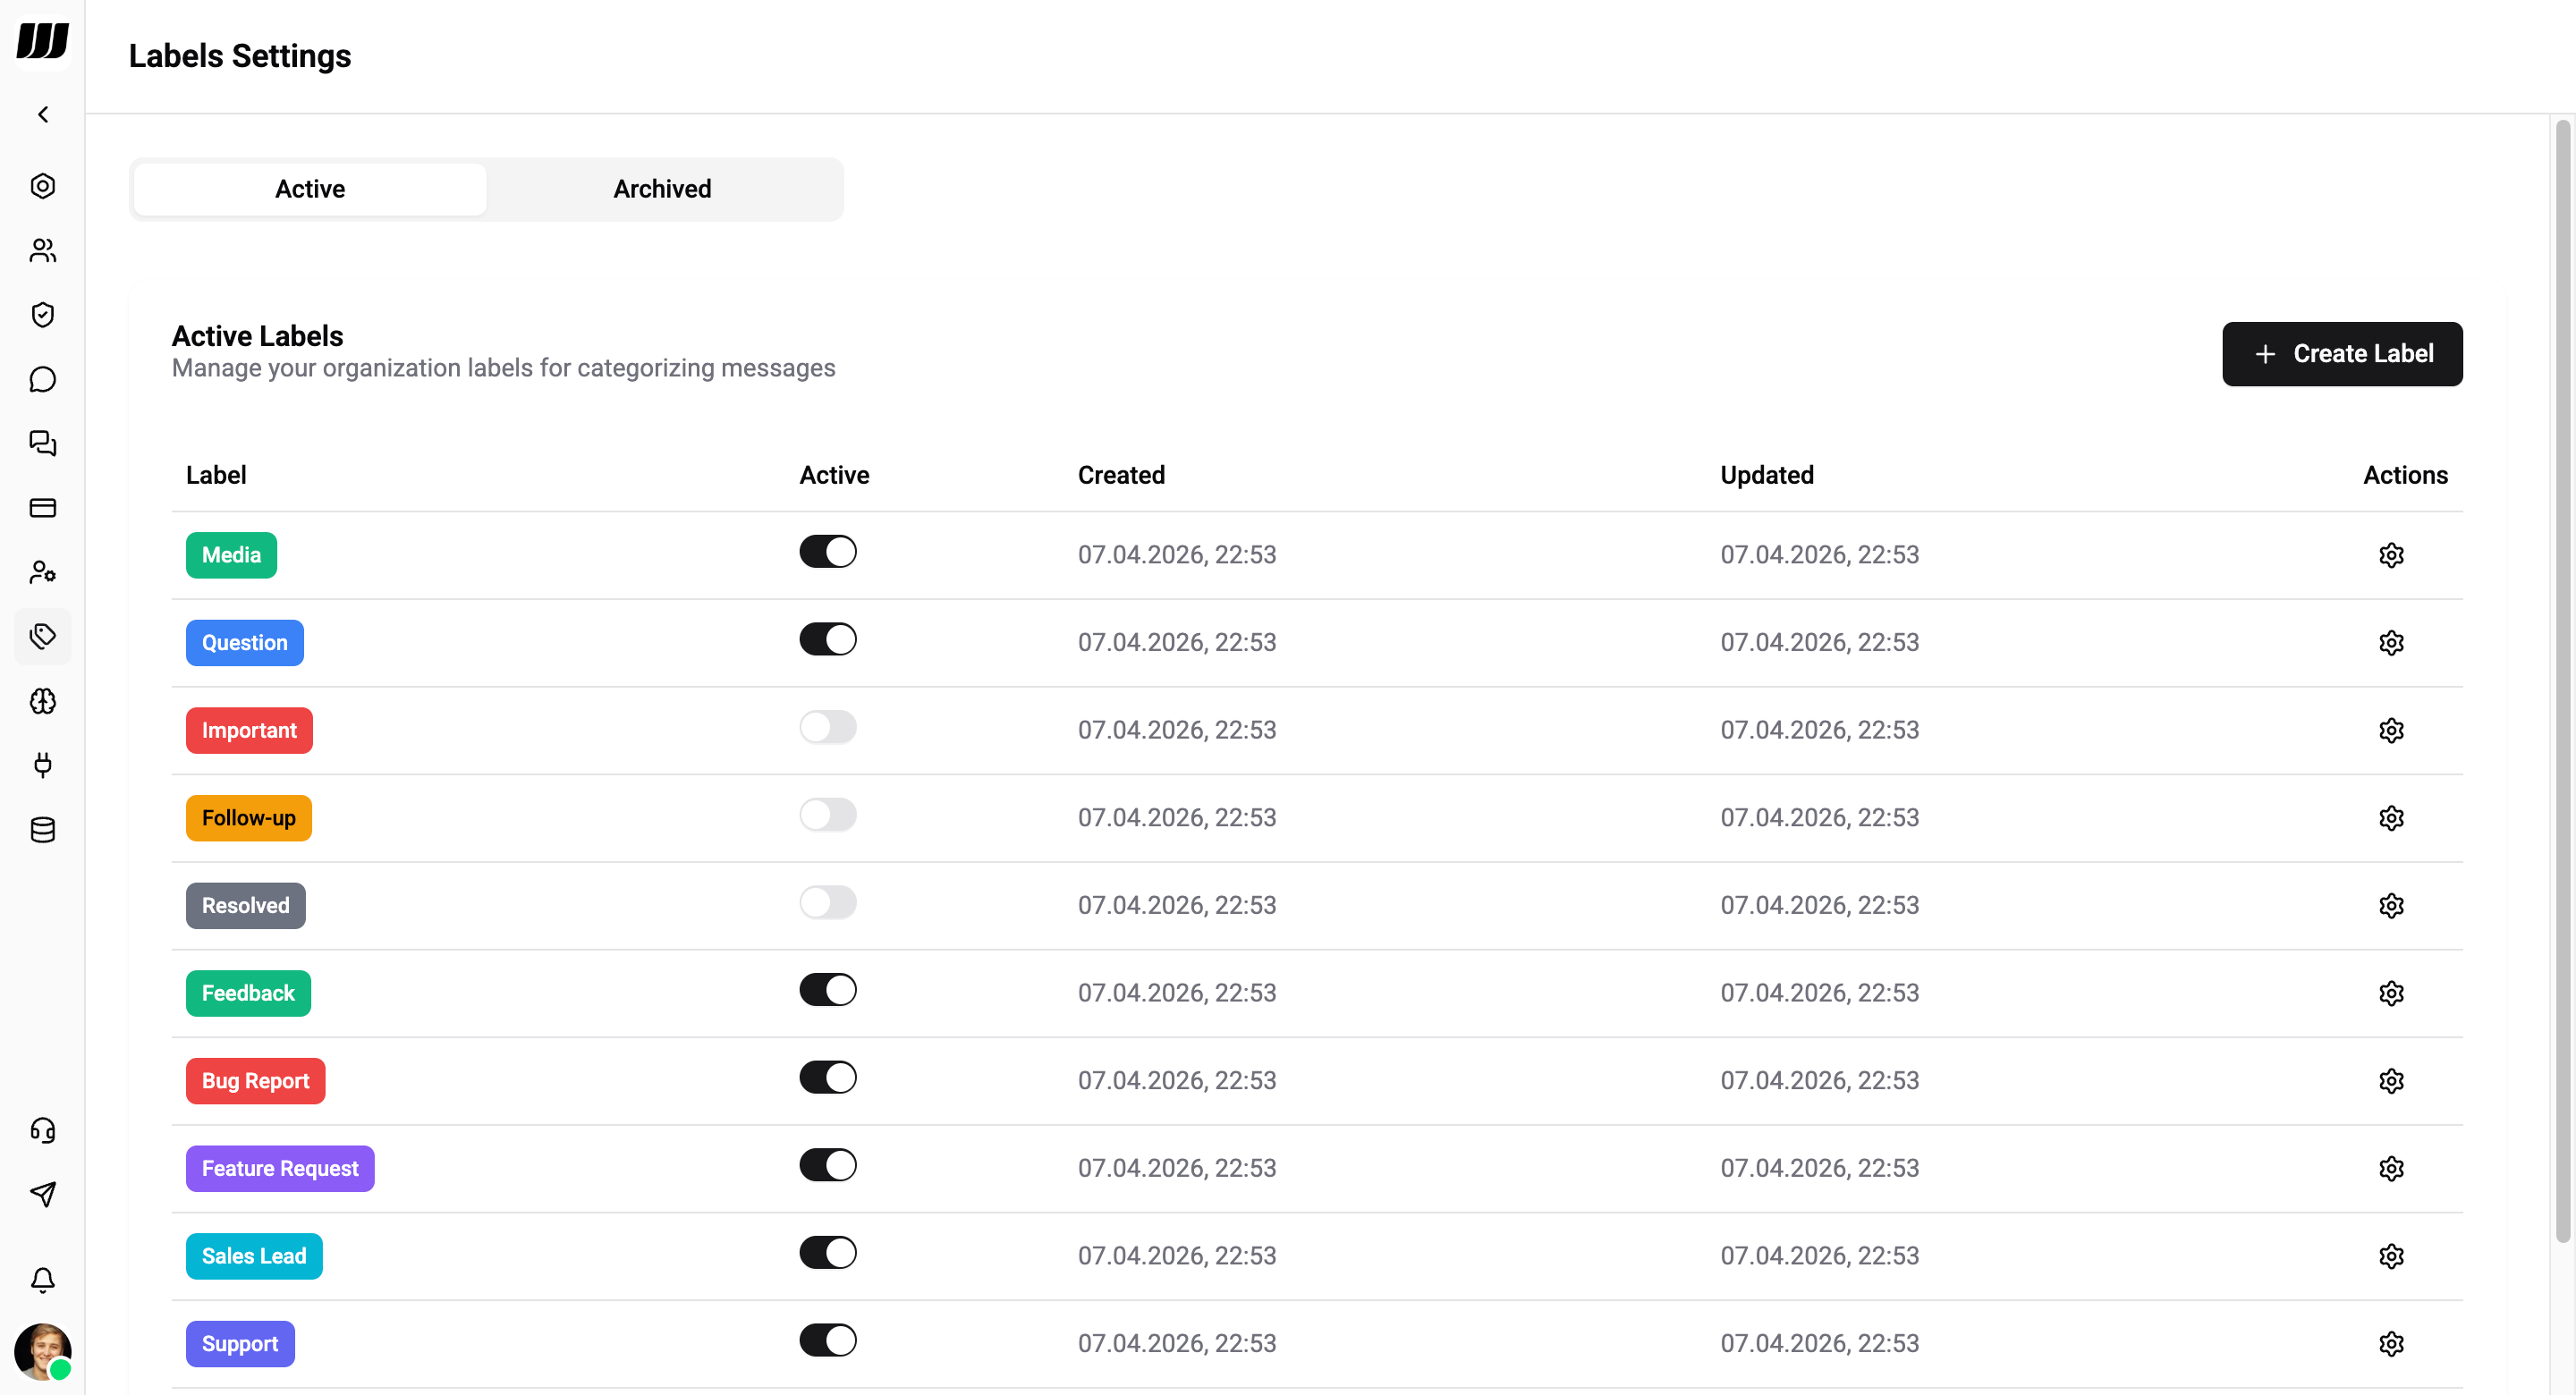
Managing Labels
The labels page has two tabs:
- Active - labels currently in use
- Archived - labels that have been deactivated but not deleted
Each label in the table shows:
| Column | Description |
|---|---|
| Label | Name and color |
| Active | Toggle to activate or archive the label |
| Created | When the label was created |
| Updated | When the label was last modified |
| Actions | Edit the label |
Archiving
Toggle a label's Active switch off to move it to the Archived tab. Archived labels are no longer available for selection in the inbox, but messages that already have the label keep it.
Toggle it back on to reactivate the label.
Editing
- Edit - change the name or color of a label
Labels are workspace-wide - all team members see and use the same label set.