Assistants
Create and configure AI-powered conversation assistants
AI Assistants are autonomous AI agents that can handle conversations, answer questions, and escalate to humans when needed.
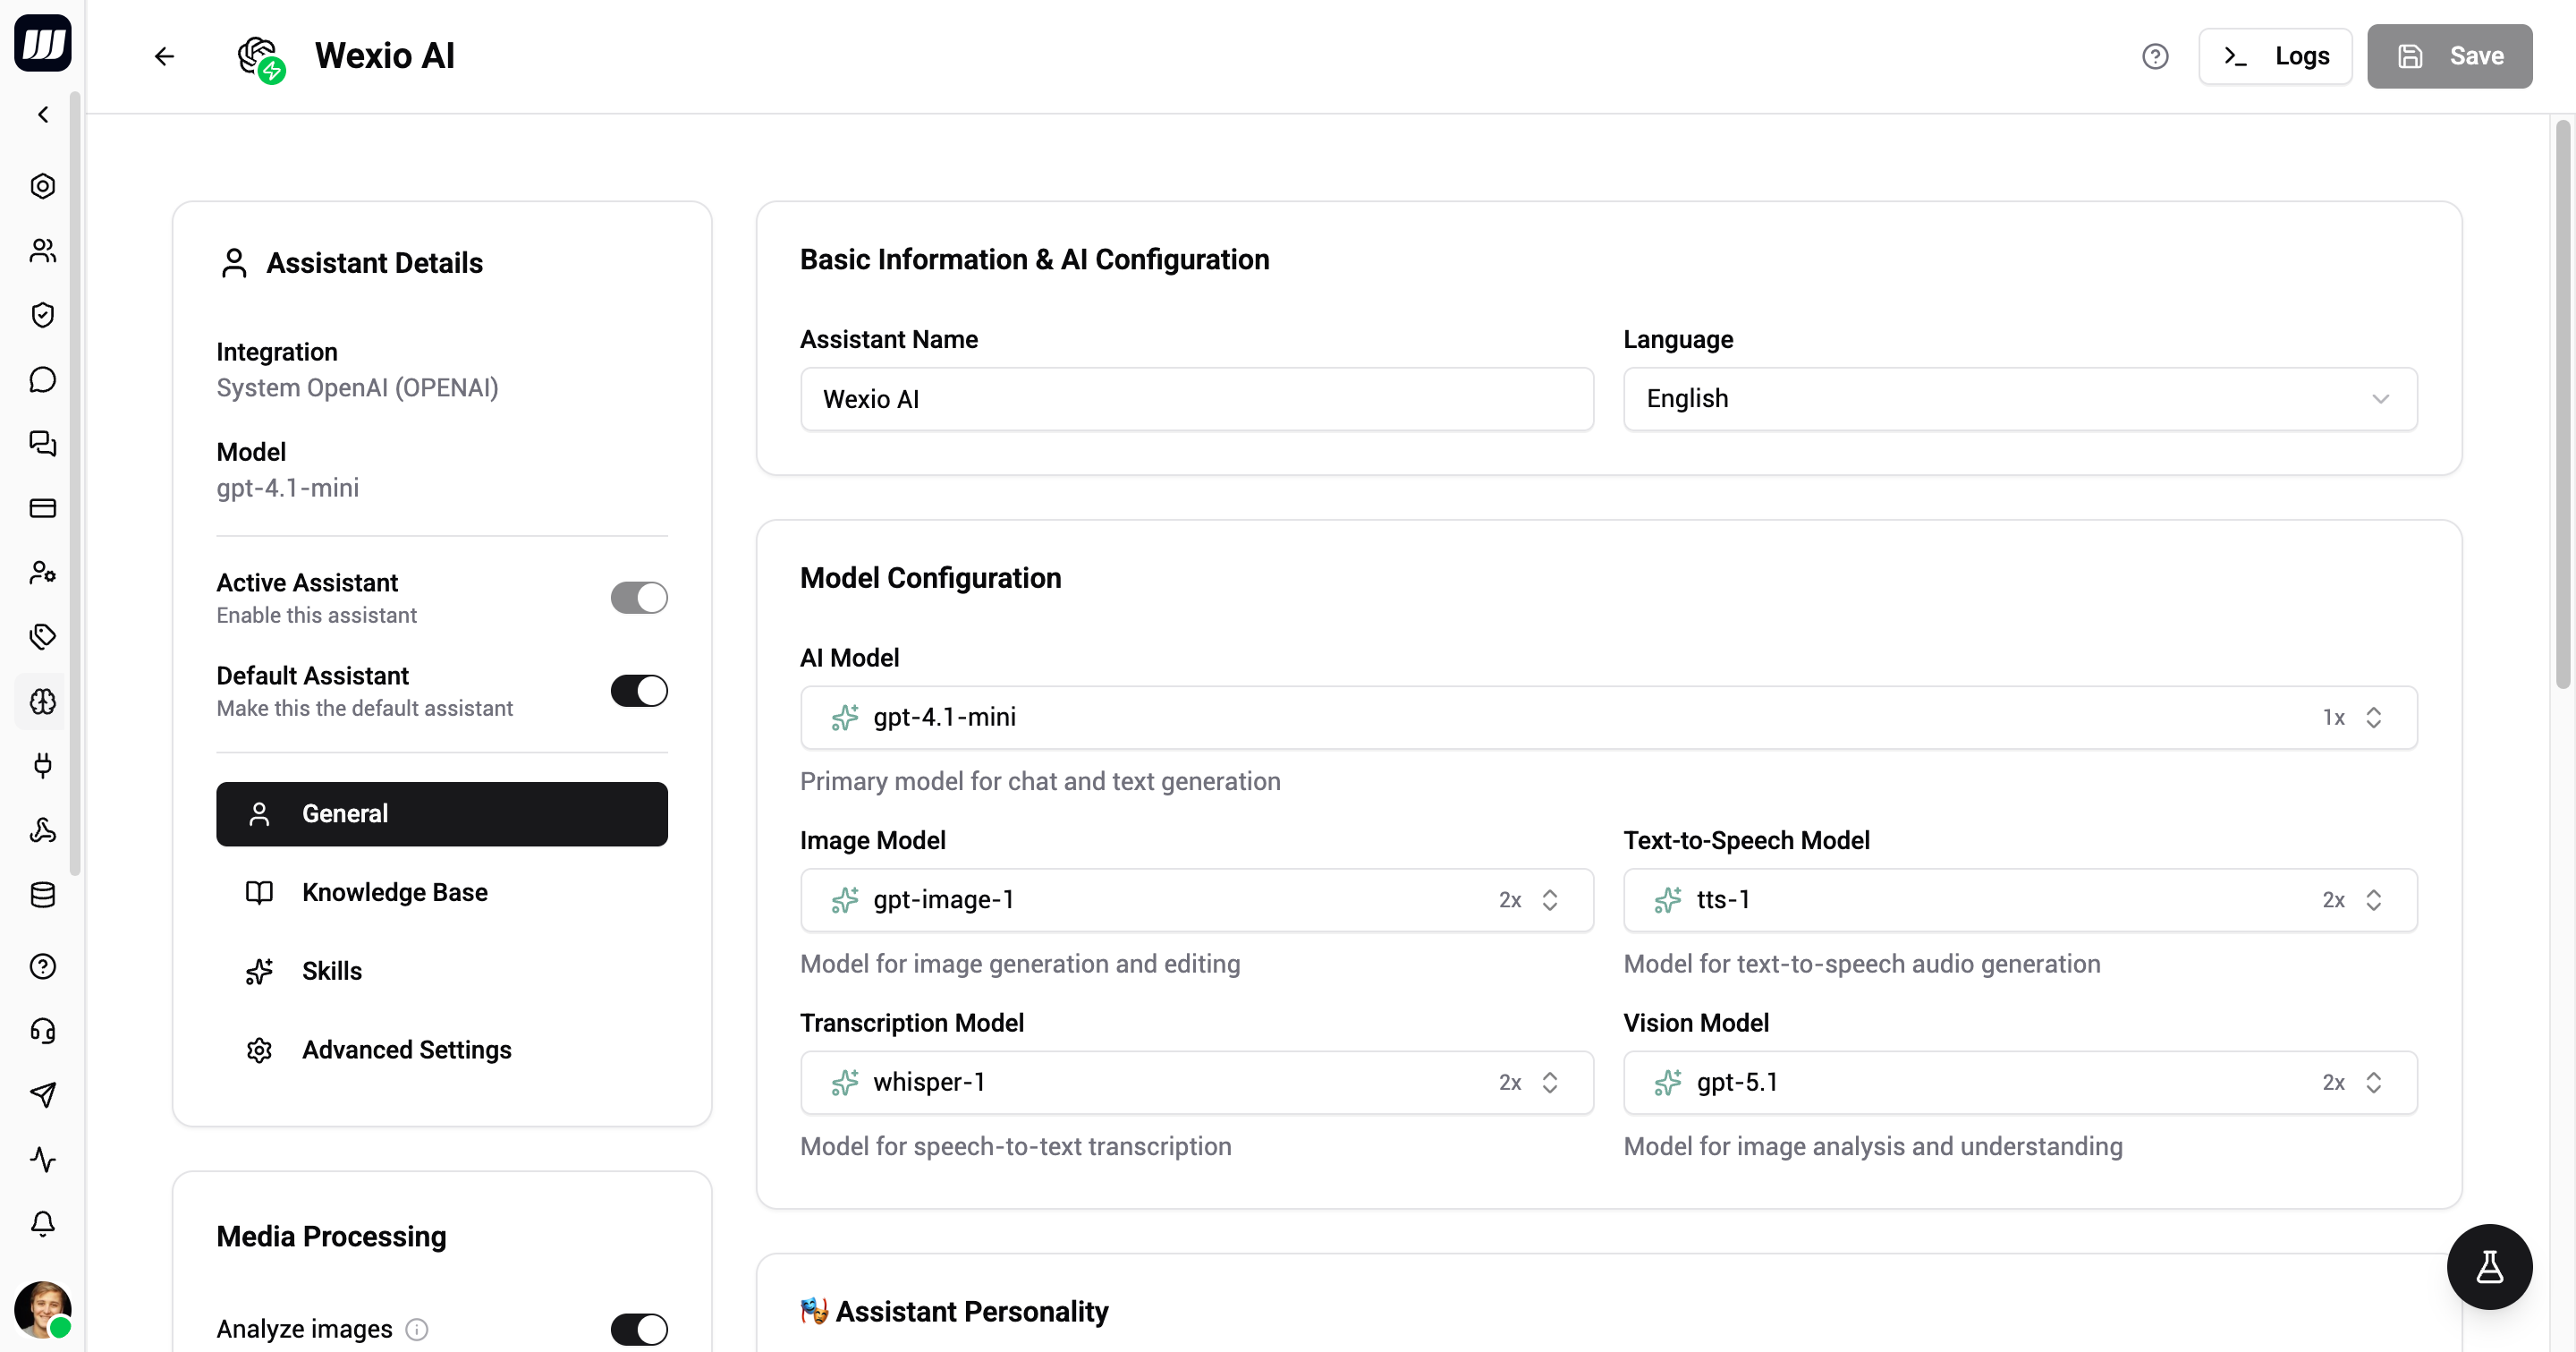
Creating an Assistant
- Navigate to Settings → AI
- Click Create Assistant
- Select the AI provider (OpenAI or Anthropic)
- Configure the assistant settings
Basic Settings
| Setting | Description |
|---|---|
| Name | The dashboard label - how you identify this assistant internally. |
| Public name | What the assistant calls itself to customers on every channel, for instance when asked "what's your name?". Falls back to the Wexio brand default when unset. |
| AI Provider | OpenAI or Anthropic integration (must be connected first) |
| Model | The primary AI model to use for chat responses |
Name and Public name are different on purpose. You might call an assistant "Support bot v3" internally while customers only ever hear the public name. Never put internal wording in the public name - it is customer-facing on every channel.
Media Processing
Each assistant decides for itself which media it can read:
| Setting | What it allows |
|---|---|
| Transcribe audio | Voice messages are transcribed so the assistant can answer them. |
| Analyze images | The assistant can see incoming pictures. |
| Analyze documents | It can read PDFs, Word files and similar. |
| Analyze videos | It can analyse incoming video. Noticeably slower. |
These used to be one inbox-wide setting and are now per assistant. Which media an incoming message gets analysed with therefore depends on which assistant is answering - an assistant with image analysis off simply does not see the picture.
Context Configuration
Define how your assistant behaves:
| Setting | Description |
|---|---|
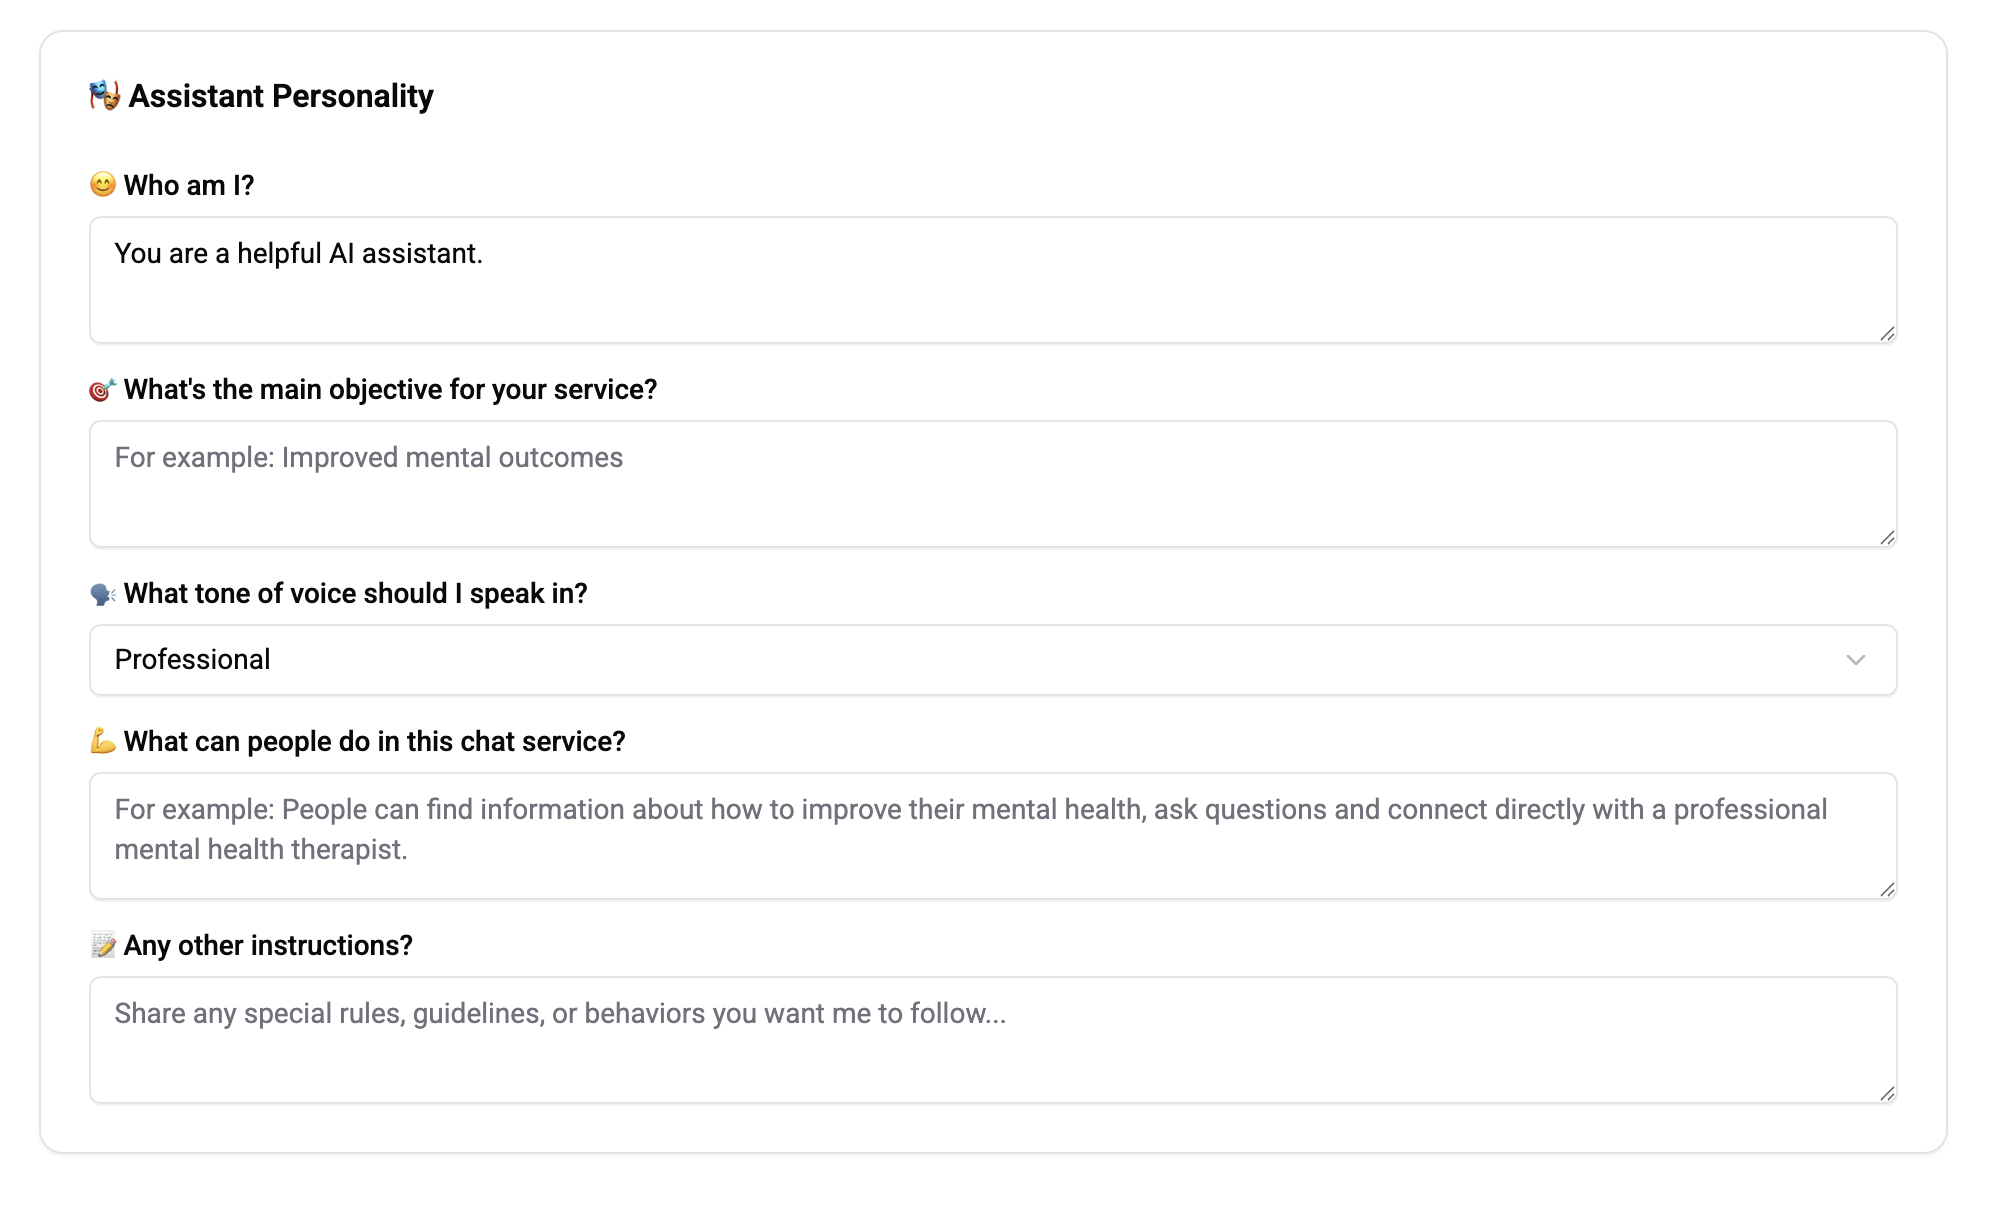
| Identity | Who the assistant is - name, role, company |
| Objective | What the assistant should accomplish |
| Tone | Communication style - formal, friendly, professional, casual |
| Language | Preferred response language |
| Capabilities | What the assistant can and cannot do |
| Instructions | Detailed behavioral guidelines |
Advanced Settings
Fine-tune the model's behavior:
| Setting | Description | Default |
|---|---|---|
| Temperature | Creativity level (0 = precise, 2 = creative) | 0.7 |
| Top-P | Nucleus sampling parameter | 1.0 |
| Frequency penalty | Reduce repetition of common phrases | 0 |
| Presence penalty | Encourage topic diversity | 0 |
| Max tokens | Maximum response length | Model default |
Per-Purpose Models
Configure specialized models for different tasks:
| Purpose | Description |
|---|---|
| Chat | Primary model for conversation replies |
| Image generation | DALL-E or GPT Image for creating images |
| Text-to-speech | TTS model for voice generation |
| Audio transcription | Whisper for speech-to-text |
| Vision | Multimodal model for understanding images |
Assigning to Inbox
Once created, assign the assistant to your inbox:
- Go to Settings → Inbox
- Select the assistant in the AI Assistant dropdown
- Save
The assistant will respond to incoming messages when AI is activated on a conversation.
More Than One Assistant
On any plan that includes AI, you can create additional assistants, with no limit on how many. A second assistant earns its place when one tone or one knowledge set does not fit every audience: pre-sales and support, or free and paying customers.
Per-Channel Override
Each connected channel can choose its own AI behaviour instead of following the organisation default:
| Mode | Behaviour |
|---|---|
| Organisation default | Use the org's default assistant. The usual choice. |
| Specific assistant | Use a different assistant just for this channel - a different tone for Instagram than for WhatsApp, say. |
| Rules | Pick the assistant per conversation from an ordered list of conditions. See below. |
| Disabled | No AI on this channel. Unmatched messages queue for a human operator. |
Set it on the channel in Settings → Integrations. The website widget has the same choices, configurable per widget.
Choosing an Assistant by Rules
Rules mode holds an ordered list of condition-to-assistant entries. The first match wins; if nothing matches, the fallback assistant answers.

A condition can test:
| Condition | Example use |
|---|---|
| Sign-in state | Signed in, or not. |
| Sign-in method | JWT, Google or passkey. |
| Verified identifiers | A confirmed email or phone number. |
| Trusted contact fields | A read-only field, or a value your backend signed into the widget token - a plan of Pro, say. |
Only trusted values can be tested: read-only fields, and values signed by your own backend into the widget token. A visitor cannot talk their way into a different assistant by claiming to be a paying customer, because the claim has to be signed.
When the choice is made. Once per conversation, with one exception worth knowing: if a visitor signs in mid-conversation while the AI is handling it, the rules are re-evaluated and the assistant can change. An assistant an operator picked is never overridden.
That mid-conversation switch is the behaviour to design around. An anonymous visitor can start with a general assistant and move to the paying-customer one the moment they sign in, without restarting the conversation.
Setting rules through the API, rather than in the settings UI, takes the same conditions in a JSON form: see writing a rule condition for the exact operators, the fields a rule can read, and how to tell which rule answered a given conversation.
Per-Chat Control
In the inbox, toggle AI on individual conversations:
- Click the AI toggle on a chat to enable/disable auto-reply
- When active, the assistant responds automatically
- When inactive, only human operators can reply
AI Preferences Bar
Each operator can customize their AI experience directly in the inbox editor:
| Setting | Description |
|---|---|
| Assistant selector | Choose which assistant powers AI actions |
| Tone | Override tone for the current session |
| Image model | Select image generation model |
| TTS voice | Choose a voice for text-to-speech |
| TTS speed | Adjust speech playback speed |
| Summarize count | How many messages to include in summaries |
Best Practices
- Be specific with instructions - The more detail in your context, the better the responses
- Set clear boundaries - Define what the assistant should NOT do
- Test extensively - Try various conversation scenarios before going live
- Monitor and iterate - Review AI conversations and adjust context based on results
- Use knowledge base - Upload relevant documents for domain-specific accuracy
- Start from a template - Browse assistant templates for ready-to-use industry configurations